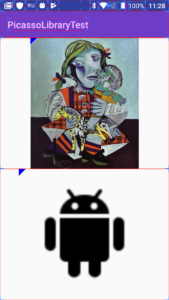
Piscassoライブラリを使ってみました。
実装を兼ねた簡単な説明をします。
Git:
https://github.com/square/picasso
実装
build.gradle
compile 'com.squareup.picasso:picasso:2.5.2'activity_main.layout
<LinearLayout xmlns:android="http://schemas.android.com/apk/res/android"
    xmlns:app="http://schemas.android.com/apk/res-auto"
    xmlns:tools="http://schemas.android.com/tools"
    android:layout_width="match_parent"
    android:layout_height="match_parent"
    android:orientation="vertical">

    <ImageView
        android:id="@+id/image_view1"
        android:layout_width="match_parent"
        android:layout_height="0dp"
        android:layout_weight="1"/>

    <ImageView
        android:id="@+id/image_view2"
        android:layout_width="match_parent"
        android:layout_height="0dp"
        android:layout_weight="1"/>

</LinearLayout>
MainActivity.java
  @Override
    protected void onCreate(Bundle savedInstanceState) {
        super.onCreate(savedInstanceState);
        setContentView(R.layout.activity_main);

        ImageView imageView = (ImageView) findViewById(R.id.image_view1);
        ImageView imageView1 = (ImageView) findViewById(R.id.image_view2);

        Picasso.with(getApplicationContext()).setLoggingEnabled(true);
        Picasso.with(getApplicationContext()).load("http://i.imgur.com/DvpvklR.png").fit().centerInside().into(imageView);
        Picasso.with(getApplicationContext()).load(R.drawable.ic_action_android).fit().centerInside().into(imageView1);
    }
・setLoggingEnabled:この関数はログを見たい時に使います。
・load:画像を読み込むファイルパスとかが入ります。
・fit:imageViewいっぱいに画像を広げます。縦横比は維持されません。
・centerInside:画像の縦横比を維持しつつimageView内の中央に配置します。
・into:画像を表示するimageViewを設定します。
非常に簡単ですね。
次から画像関係の処理をするときは、
使ってみようかなと思います。

以上です。